
If you compile data from multiple sources into a single worksheet, you may end up with duplicate rows. And in most cases, you will want to eliminate these duplicates.
For example, if you have combined lists of names and addresses, you want to ensure that the names and addresses are unique or only listed once in your list.
Or you have a list of invoices and you want to make sure there are no duplicates.
Instead of manually looking through your data and deleting duplicate rows, use the Remove Duplicates feature to get Excel to delete the duplicate rows for you.
The Remove Duplicates feature was introduced in Excel 2007.
Caution:
Excel’s Remove Duplicates feature does delete the duplicate rows.
Just to be safe, you may want to create a backup copy of your worksheet or workbook before you proceed to Remove Duplicates.
To Remove Duplicates in Excel:
1.
Create a Backup Copy of your worksheet or workbook before proceeding, just in case.
Remember: Excel’s Remove Duplicate feature does delete the duplicate rows.
2.
Select any cell within the data range.
e.g. On sheet 1, click on cell A2
3.
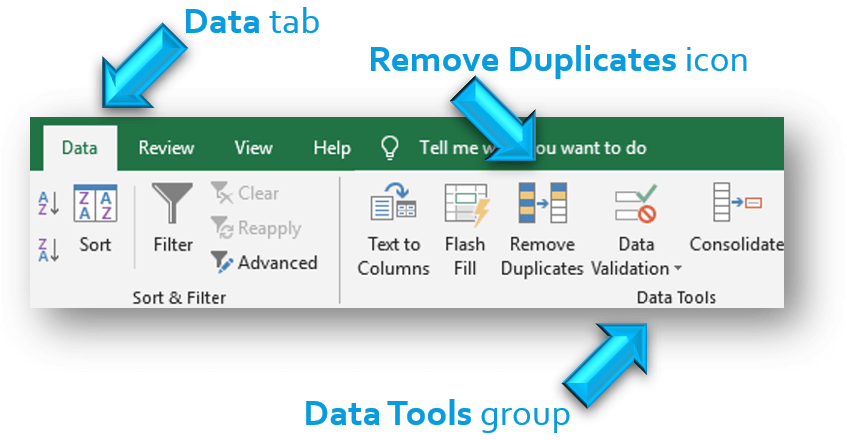
On the Data tab, in the Data Tools group, click the Remove Duplicates icon.
Excel expands the selection to include the entire data range.
e.g. Excel expands to select cells in the data range,
A1 to E400
4.
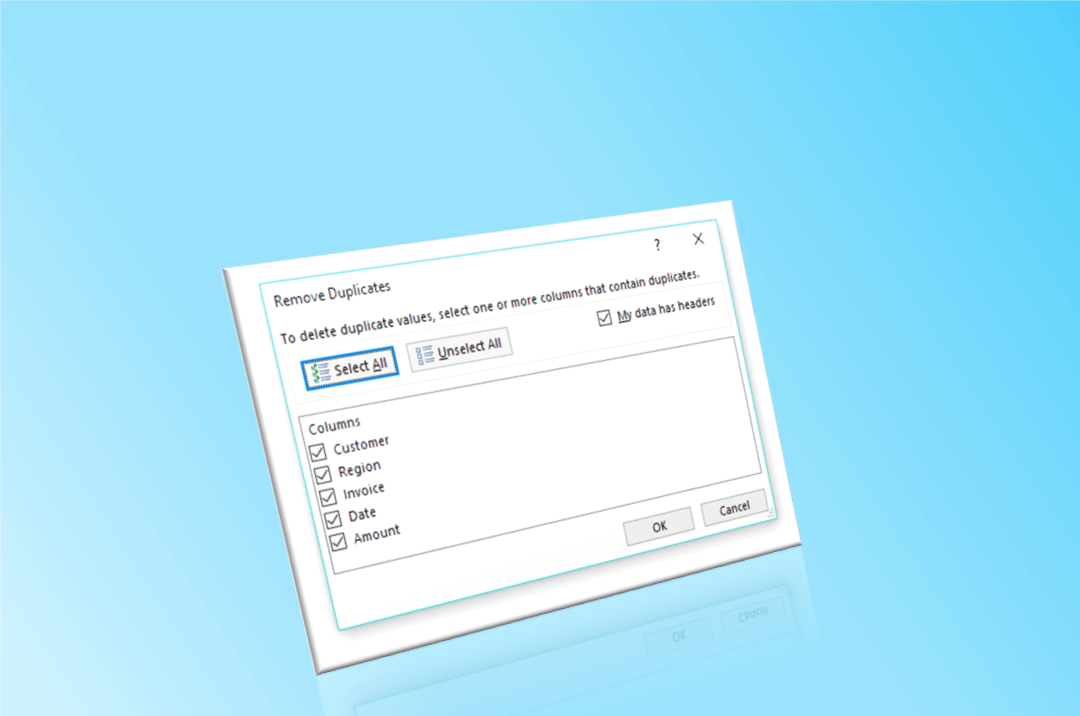
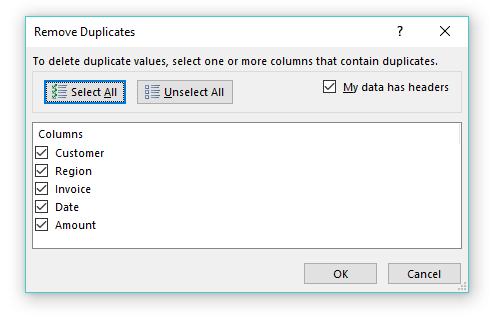
In the Remove Duplicates dialog box, Excel determines if your data has headers.
This dialog box displays all of the columns in your data range.
5.
Place a checkmark next to the columns that you want to include in the duplicate search.
By default, Excel selects all of the columns.
And most of the time, you will want to include all columns in your search.
When all columns are selected, Excel deletes a row only if the content of every column is duplicated.
In other situations, you may not want to analyze all the columns for duplicates. In that case, uncheck those columns in the Remove Duplicates dialog box.
6.
Click OK to remove the duplicates.
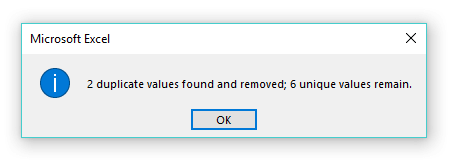
Excel displays:
- how many duplicate values were found and removed
- and how many unique values remain
Note: When duplicates rows are found, the first row is kept and all subsequent duplicate rows are deleted.
If there are no duplicates, the message “No duplicate values found” is displayed.
Excel displays the unique values that you have specified.
Note: Click Undo or Ctrl + Z, if too many rows are deleted.
To Remove Duplicates in an Excel Table:
If your data is in a table, the Remove Duplicates feature is also available in Table Tools.
Go to Table Tools, on the Design Tab, in the Tools group, click the Remove Duplicates icon.
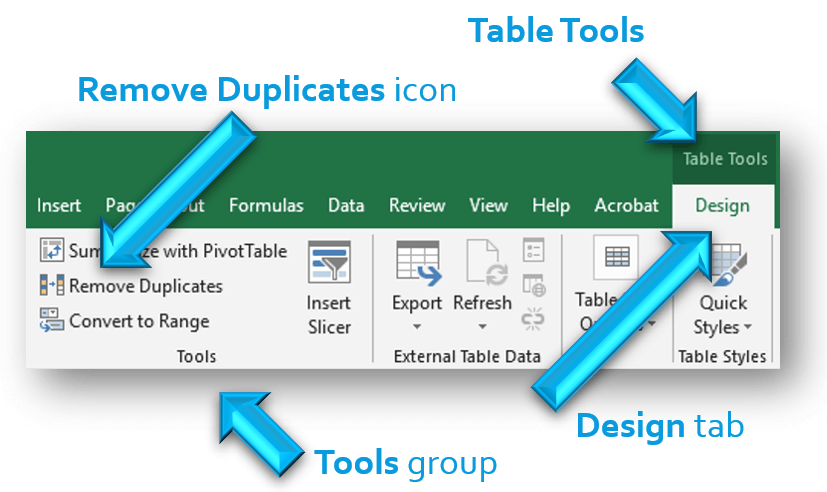
Note: The Remove Duplicates feature for Tables works exactly the same as outlined above.
Remember: Excel’s Remove Duplicate feature does delete the duplicate rows. If you want to find the duplicates and then choose to remove them, refer to my post on Find Duplicates in Excel.
The Remove Duplicates feature saves you from manually looking through your list for duplicates and then deleting them.
Please share this with other Excel users and save them hours of manual work.
~ Let Microsoft Excel do the work for you. ~
0 Comments